Making homemade dipped chocolates yields impressive results, perfect for gift giving and entertaining. With a few tips for melting and tempering chocolate, you can drape a variety of sweets with a coating of silky chocolate.
 Creating chocolate-shop-style bonbons starts with preparing a creamy filling. Flavor it with liqueur or vanilla as desired, then roll the filling into balls that are ready for dipping into chocolate. If you are eating the candy right away, you may choose not to temper the chocolate to save time, but tempering does keep the chocolate from blooming (see tempering method and more about blooming, below).
Step 1: Stirring together the filling ingredients
Butter the sides of a heavy 2-quart saucepan. This helps to prevent the filling from climbing up the sides and boiling over. Combine the sugar, water, half-and-half or light cream, and light-color corn syrup.
Step 2: Cooking the filling to soft-ball stage
Cook the filling mixture over medium-high heat to boiling, stirring constantly with a wooden spoon. This step dissolves the sugar entirely so the filling won’t be granular. It should take 5 to 6 minutes. Clip a candy thermometer to the side of the pan, making sure the bulb of the thermometer is completely covered by the filling mixture and not touching the bottom of the pan. Reduce the heat to medium-low. Cook, stirring occasionally, until the thermometer registers 240 degrees F, soft-ball stage. The mixture should boil at a moderate, steady rate over the entire surface. Reaching soft-ball stage should take 15 to 20 minutes.
Tip: When stirring the filling, stir gently so it doesn’t splash on the side of the saucepan, which can cause crystals to form and clump together in the saucepan.
Tip: Another way to test soft-ball stage is to quickly drop a few drops of the hot mixture from a spoon into a cup of very cold (but not icy) water. Working in the water, use your fingers to form the drops of candy into a ball. Remove the ball from the water. At the soft-ball stage, the candy instantly flattens and runs between your fingers.
Step 3: Rolling out the filling
Cool the filling, without stirring, to lukewarm. This should take about 45 minutes. Flavor the filling with liqueur, such as amaretto or coffee liqueur, or with vanilla. Beat the filling with a wooden spoon until creamy and slightly still (about 10 minutes). With your hands, roll the filling into 1-inch balls and let stand at room temperature for 20 minutes to dry.
Step 4: Dipping into melted chocolate
To dip the candies you can use chocolate-like confectioner’s coating, which requires no tempering, or your favorite type of chocolate (see Melting Chocolate, below). Carefully drop the filling balls into the melted chocolate, one at a time, and turn to coat. With a fork, lift each ball out of the chocolate mixture, drawing the fork across the rim of the pan to remove excess chocolate. Invert each ball onto a baking sheet lined with waxed paper. Twist the fork slightly as the candy falls to swirl the top. If a lot of chocolate pools at the base of the first ball, let more chocolate drip off the fork next time before inverting. Let chocolates set up on waxed paper until dry to the touch. Transfer to a covered container and store in a cool, dry place.
Melting Chocolate
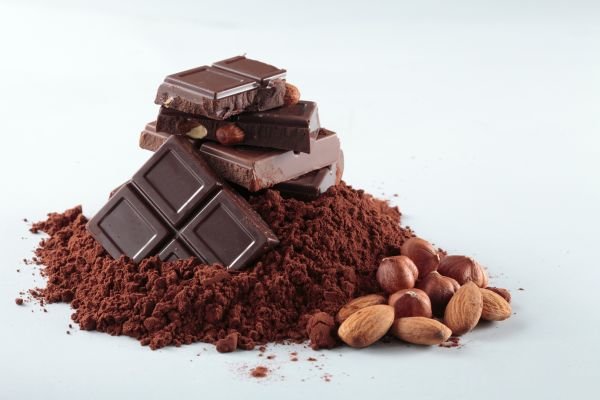
 Once you master melting chocolate, you can do so much with it, including dipping homemade or purchased candy centers, making truffles, and drizzling garnishes atop desserts. Follow the simple instructions below for melting chocolate. You can also go a step farther and temper your chocolate, following the quick-tempering directions. Tempering is recommended for dipped chocolates; this method melts the chocolate slowly enough to stabilize the cocoa butter, assuring a glossy shine that holds its shape and prevents blooming (this occurs when the surface of the chocolate gets white streaks or speckles on it once the chocolate sets up).
Melting chocolate in the microwave
 Place 1 cup or 6 ounces of chopped chocolate bars, chocolate squares, or chocolate pieces in a microwave-safe bowl or measuring cup. Microwave, uncovered, on 70 percent power (medium-high) for 1 minute; stir. Microwave on 70 percent power (medium-high) for 1-1/2 to 3 minutes more, stirring every 15 seconds until the chocolate is melted and smooth.
Melting chocolate on the stovetop
Place the chocolate in a saucepan over very low heat, stirring until the chocolate begins to melt. Immediately remove the pan from the heat and stir the chocolate until it is smooth. You can use a double boiler for melting chocolate on the stovetop, which eliminates the possibility of scorching, but it isn’t necessary as long as you use a heavy saucepan, stir constantly, and keep the heat low.
Tips for melting chocolate
- Coarsely chop chocolate bars and squares before melting. This speeds up the melting time and helps to avoid scorching.
- Stir constantly because most chocolate retains its shape as it melts. This also helps keep the chocolate from scorching.
- Moisture can cause the chocolate to seize (get hard), so make sure your equipment is completely dry. Water droplets can also be an issue when using a double boiler. If your chocolate does seize, stir in 1/2 to 1 teaspoon shortening (not butter) for every ounce of chocolate, and it should melt again.
Quick-tempering chocolate
 Chop semisweet, bittersweet, dark, or milk chocolate. Place in a 2-quart bowl with shortening; stir to coat chocolate with shortening. Pour very warm tap water (110 degrees F) in a very large bowl to a depth of 1 inch. Place the bowl with chocolate inside the bowl of warm water (water should cover bottom half of bowl of chocolate). Adjust water level as necessary (be careful not splash any water into the chocolate). Stir the chocolate mixture constantly with a rubber spatula until completely melted and smooth (this should take 20 to 25 minutes). When the water cools, remove the bowl containing the chocolate. Discard the cool water; add warm water and continue as above until all the chocolate is melted.
Ideas for dipping chocolate
- Dried fruit such as apricots, apples, or pears with dark, white, or milk chocolate (if you like, use a spoon to drizzle a second kind of chocolate atop, once the dipped chocolate is set up)
- Pretzels
- Fresh strawberries
- Caramels
- Marshmallows
- Truffles
- Whole nuts
- Cubed angel food cake
With a spoon, drizzle chocolate atop
- Fresh fruit pieces
- Cakes and cheesecakes
- Cookies
- Nuts and dried cherries or cranberries to make clusters
- Toffee or almond bark
- Peanut butter bars or blond brownies
Check out more:
Chocolate: Types, Selection and Storage
How to Bake with Chocolate
Chocolate Substitutes
Tempering Chocolate
About Chocolate
- 3.2K
- 8.5K
- 224